Welcome to duiniwukenaihe's Blog!
这里记录着我的运维学习之路-
kubernetes集群扩容
描述背景:
已经搭建完的k8s集群只有两个worker节点,现在增加work节点到集群。原有集群机器:
ip 自定义域名 主机名 master.k8s.io k8s-vip 192.168.0.195 master01.k8s.io k8s-master-01 192.168.0.197 master02.k8s.io k8s-master-02 192.168.0.198 master03.k8s.io k8s-master-03 192.168.0.199 node01.k8s.io k8s-node-01 192.168.0.202 node02.k8s.io k8s-node-02 本地搭建的用了一种不要脸的方式,基本搭建方式如https://duiniwukenaihe.github.io/2019/09/02/k8s-install/, master01 master02 节点host master.k8s.io绑定了192.168.0.195.master03节点master.k8s.io绑定了192.168.0.197跑了下貌似也是没有问题的。现在将一下三台机器加入集群: |192.168.0.108 | node03.k8s.io | k8s-node-03| |192.168.0.111 | node04.k8s.io | k8s-node-04| |192.168.0.115 | node05.k8s.io | k8s-node-05| 三台绑定host 192.168.0.108 cat /etc/host 192.168.0.197 master.k8s.io k8s-vip 192.168.0.195 master01.k8s.io k8s-master-01 192.168.0.197 master02.k8s.io k8s-master-02 192.168.0.198 master03.k8s.io k8s-master-03 192.168.111 cat /etc/host 192.168.0.198 master.k8s.io k8s-vip 192.168.0.195 master01.k8s.io k8s-master-01 192.168.0.197 master02.k8s.io k8s-master-02 192.168.0.198 master03.k8s.io k8s-master-03 192.168.115 cat /etc/host 192.168.0.195 master.k8s.io k8s-vip 192.168.0.195 master01.k8s.io k8s-master-01 192.168.0.197 master02.k8s.io k8s-master-02 192.168.0.198 master03.k8s.io k8s-master-03 参照https://duiniwukenaihe.github.io/2019/09/02/k8s-install/完成系统参数调优,配置yum源 安装docker kubernetes任一master节点执行kubeadm token list,查看是否有有效期内token和SH256加密字符串
 token默认的有效期是24小时,如果没有有效token,则将创建token
kubeadm token create

openssl x509 -pubkey -in /etc/kubernetes/pki/ca.crt | openssl rsa -pubin -outform der 2>/dev/null | openssl dgst -sha256 -hex | sed 's/^.* //'
k8s-node-03 k8s-node-04 k8s-node-05节点加入集群

没有关闭swap 加入集群命令加入–ignore-preflight-errors=Swap:
kubeadm join master.k8s.io:8443 –token u7lv9t.bubw4r69tkmorug2 –discovery-token-ca-cert-hash sha256:74e007d58a810fd4e8a233158d0b8e195641f724ad402e4afddc77e0eb003d95 –ignore-preflight-errors=Swap
 master节点执行kubectl get nodes

-
docker 搭建gitlab迁移到kubernetes集群
描述背景:
早前公司代码管理采用的docker compose搭建的gitlab管理。为完成资源优化,高可用。现在将环境迁移到kubernetes集群环境中。compose 文件基本是基于https://raw.githubusercontent.com/sameersbn/docker-gitlab/master/docker-compose.yml进行修改的,修改了gitlab images twang2218/gitlab-ce-zh:latest 中文版镜像.gitlab postgresql redis都挂载本地目录为/data/docker/相对应目录下 端口映射80映射到主机10080 22 映射到10022主机端口。
如下图:
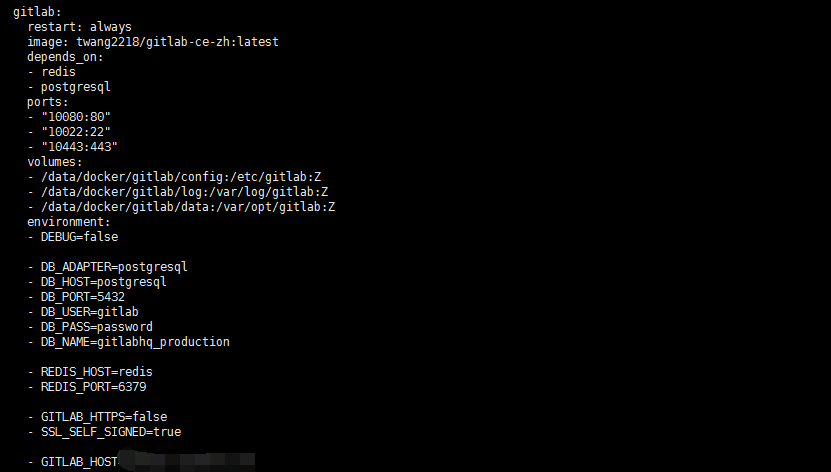
gitlab 主要涉及Redis、Postgresql、Gitlab三个应用,现在基于kubernetes 先搭建gitlab初始化环境:
注: 个人存储使用了rook的ceph,所以持久化存储都采用了rook ceph.
环境搭建:
1 . gitlab redis 应用搭建
cat <<EOF >  gitlab-redis.yaml
apiVersion: v1
kind: PersistentVolumeClaim
metadata:
  name: gitlab-redis
  namespace: kube-ops
  labels:
    name: redis
spec:
  storageClassName: rook-ceph-block
  accessModes:
  - ReadWriteOnce
  resources:
    requests:
      storage: 1Gi
---
apiVersion: apps/v1
kind: Deployment
metadata:
  name: redis
  namespace: kube-ops
  labels:
    name: redis
spec:
  selector:
    matchLabels:
      name: redis
  template:
    metadata:
      name: redis
      labels:
        name: redis
    spec:
      containers:
      - name: redis
        image: sameersbn/redis
        imagePullPolicy: IfNotPresent
        ports:
        - name: redis
          containerPort: 6379
        volumeMounts:
        - mountPath: /var/lib/redis
          name: gitlab-redis
        livenessProbe:
          exec:
            command:
            - redis-cli
            - ping
          initialDelaySeconds: 30
          timeoutSeconds: 5
        readinessProbe:
          exec:
            command:
            - redis-cli
            - ping
          initialDelaySeconds: 5
          timeoutSeconds: 1
      volumes:
      - name: gitlab-redis
        persistentVolumeClaim:
          claimName: gitlab-redis

---
apiVersion: v1
kind: Service
metadata:
  name: redis
  namespace: kube-ops
  labels:
    name: redis
spec:
  ports:
    - name: redis
      port: 6379
      targetPort: redis
  selector:
    name: redis
EOF
kubectl apply -f gitlab-redis.yaml2 . gitlab portgresql 环境搭建
cat <<EOF >gitlab-postgresql.yaml
apiVersion: v1
kind: PersistentVolumeClaim
metadata:
  name: gitlab-postgresql
  namespace: kube-ops
  labels:
    name: postgresql
spec:
  storageClassName: rook-ceph-block
  accessModes:
  - ReadWriteOnce
  resources:
    requests:
      storage: 1Gi
---
apiVersion: apps/v1
kind: Deployment
metadata:
  name: postgresql
  namespace: kube-ops
  labels:
    name: postgresql
spec:
spec:
  selector:
    matchLabels:
      name: postgresql
  template:
    metadata:
      name: postgresql
      labels:
        name: postgresql
    spec:
      containers:
      - name: postgresql
        image: sameersbn/postgresql:10
        imagePullPolicy: IfNotPresent
        env:
        - name: DB_USER
          value: gitlab
        - name: DB_PASS
          value: passw0rd
        - name: DB_NAME
          value: gitlab_production
        - name: DB_EXTENSION
          value: pg_trgm
        ports:
        - name: postgres
          containerPort: 5432
        volumeMounts:
        - mountPath: /var/lib/postgresql
          name: gitlab-postgresql
        livenessProbe:
          exec:
            command:
            - pg_isready
            - -h
            - localhost
            - -U
            - postgres
          initialDelaySeconds: 30
          timeoutSeconds: 5
        readinessProbe:
          exec:
            command:
            - pg_isready
            - -h
            - localhost
            - -U
            - postgres
          initialDelaySeconds: 5
          timeoutSeconds: 1
      volumes:
      - name: gitlab-postgresql
        persistentVolumeClaim:
          claimName: gitlab-postgresql

---
apiVersion: v1
kind: Service
metadata:
  name: postgresql
  namespace: kube-ops
  labels:
    name: postgresql
spec:
  ports:
    - name: postgres
      port: 5432
      targetPort: postgres
  selector:
    name: postgresql

EOF
kubectl apply -f gitlab-postgresql.yaml3 . gitlab 应用搭建
cat <<EOF >gitlab.yaml

apiVersion: v1
kind: PersistentVolumeClaim
metadata:
  name: gitlab
  labels:
    app: gitlab
  namespace: kube-ops
spec:
  storageClassName: rook-ceph-block
  accessModes:
  - ReadWriteOnce
  resources:
    requests:
      storage: 20Gi
---
apiVersion: apps/v1
kind: Deployment
metadata:
  name: gitlab
  namespace: kube-ops
  labels:
    name: gitlab
spec:
spec:
  selector:
    matchLabels:
      name: gitlab
  template:
    metadata:
      name: gitlab
      labels:
        name: gitlab
    spec:
      containers:
      - name: gitlab
        image: twang2218/gitlab-ce-zh:10.8.3
        imagePullPolicy: IfNotPresent
        env:
        - name: TZ
          value: Asia/Shanghai
        - name: GITLAB_TIMEZONE
          value: Beijing
        - name: GITLAB_SECRETS_DB_KEY_BASE
          value: long-and-random-alpha-numeric-string
        - name: GITLAB_SECRETS_SECRET_KEY_BASE
          value: long-and-random-alpha-numeric-string
        - name: GITLAB_SECRETS_OTP_KEY_BASE
          value: long-and-random-alpha-numeric-string
        - name: GITLAB_ROOT_PASSWORD
          value: admin321
        - name: GITLAB_ROOT_EMAIL
          value: zhangpeng19871017@hotmail.com
        - name: GITLAB_HOST
          value: gitlab.zhangpeng.com
        - name: GITLAB_PORT
          value: "80"
        - name: GITLAB_SSH_PORT
          value: "22"
        - name: GITLAB_NOTIFY_ON_BROKEN_BUILDS
          value: "true"
        - name: GITLAB_NOTIFY_PUSHER
          value: "false"
        - name: GITLAB_BACKUP_SCHEDULE
          value: daily
        - name: GITLAB_BACKUP_TIME
          value: 01:00
        - name: DB_TYPE
          value: postgres
        - name: DB_HOST
          value: postgresql
        - name: DB_PORT
          value: "5432"
        - name: DB_USER
          value: gitlab
        - name: DB_PASS
          value: passw0rd
        - name: DB_NAME
          value: gitlab_production
        - name: REDIS_HOST
          value: redis
        - name: REDIS_PORT
          value: "6379"
        ports:
        - name: http
          containerPort: 80
        - name: ssh
          containerPort: 22
        volumeMounts:
        - mountPath: /var/opt/gitlab
          name: gitlab
        livenessProbe:
          httpGet:
            path: /
            port: 80
          initialDelaySeconds: 180
          timeoutSeconds: 5
        readinessProbe:
          httpGet:
            path: /
            port: 80
          initialDelaySeconds: 5
          timeoutSeconds: 1
      volumes:
      - name: gitlab
        persistentVolumeClaim:
          claimName: gitlab
---
apiVersion: v1
kind: Service
metadata:
  name: gitlab
  namespace: kube-ops
  labels:
    name: gitlab
spec:
  ports:
    - name: http
      port: 80
      targetPort: http
    - name: ssh
      port: 22
      targetPort: ssh
  selector:
    name: gitlab
EOF
kubectl apply -f gitlab.yaml等待gitlab 容器状态 running & kubectl get svc -n kube-ops

4 . 访问主机ip+svc 对外暴露端口验证
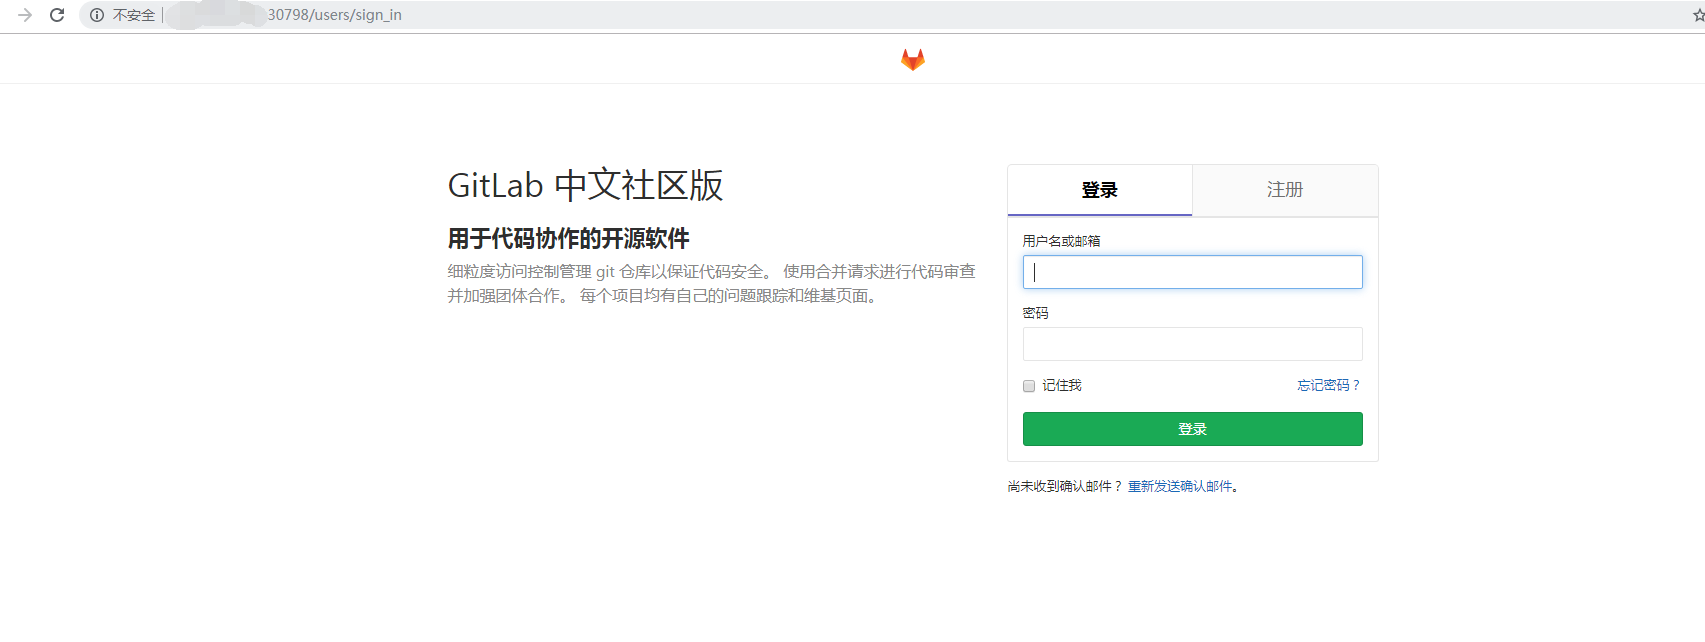
备份原有docker gitlab环境项目备份:
主要参考:https://blog.csdn.net/ygqygq2/article/details/85007910#21__15
1 . 进入gitlab容器,备份仓库:
docker exec -it f80f368d857c bash
gitlab-rake gitlab:backup:create
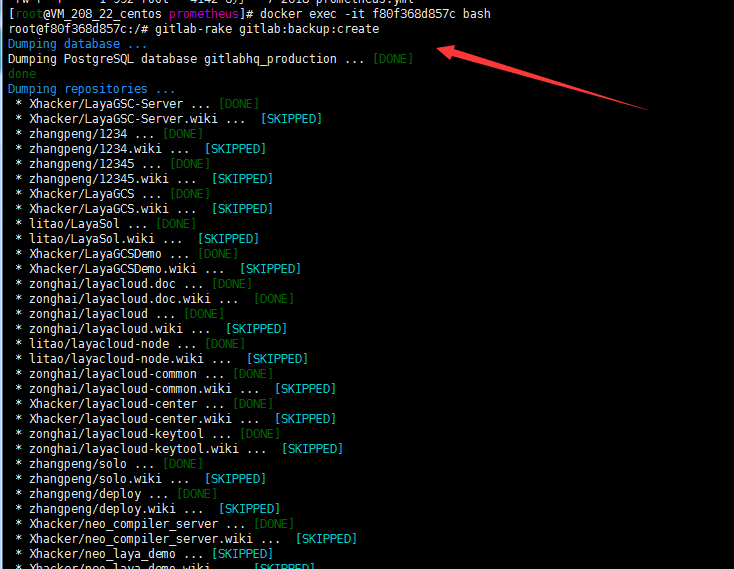
2 . 进入宿主机挂载的对应目录发现备份文件生成&将备份文件copy 到kubernetes集群中master节点
cd /data/docker/gitlab/data/backups
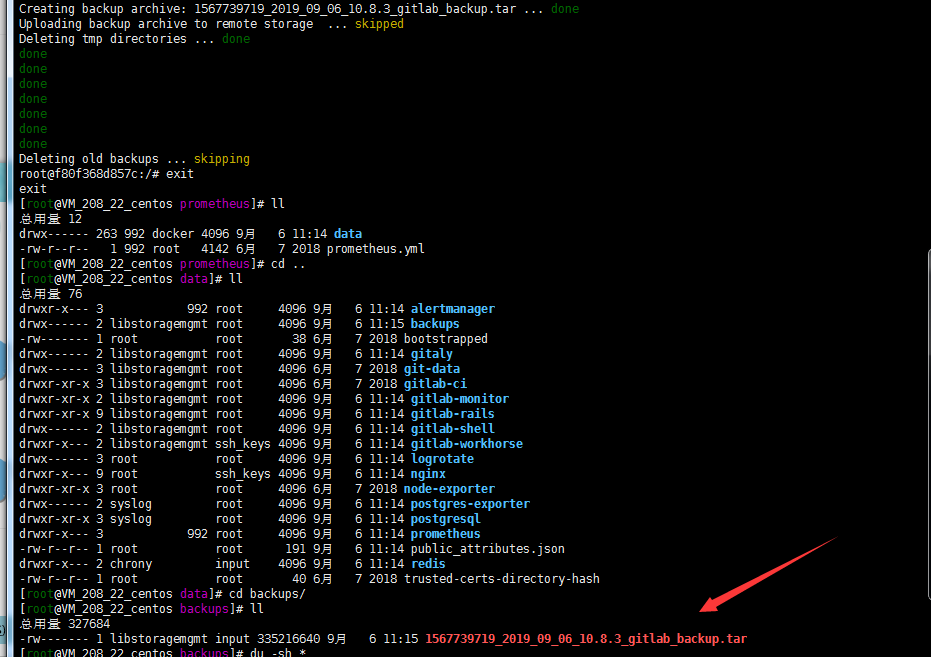
kubectl cp 1567739719_2019_09_06_10.8.3_gitlab_backup.tar gitlab-78b9f67956-s9nmr:/var/opt/gitlab/backups -n kube-ops
kubectl exec -it gitlab-78b9f67956-s9nmr bash -n kube-ops
gitlab-rake gitlab:backup:restore
出现以下报错。看日志发现docker compose 环境下gitlab版本为10.8.3 。kubernetes集群版本gitlab image 为11.1.4.这也是比较推荐用详细版本号不要用latest版本的原因。

修改gitlab.yaml 文件gitlab image 版本号 & kubectl apply gitlab.yaml ,出现下图所示还原完成
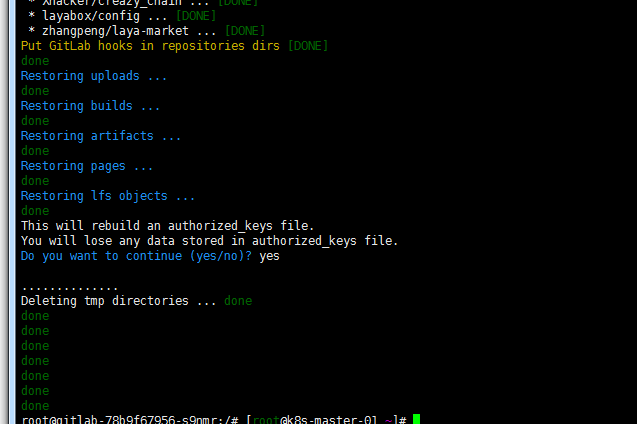
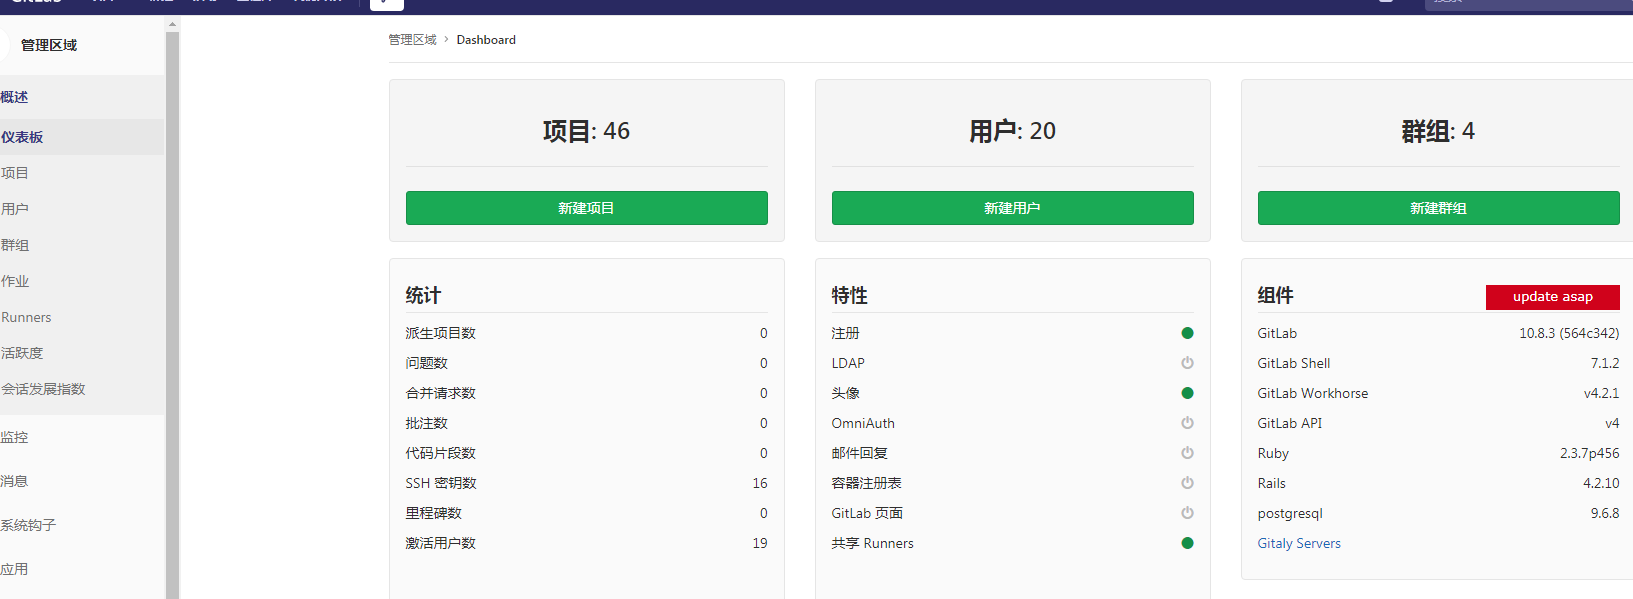
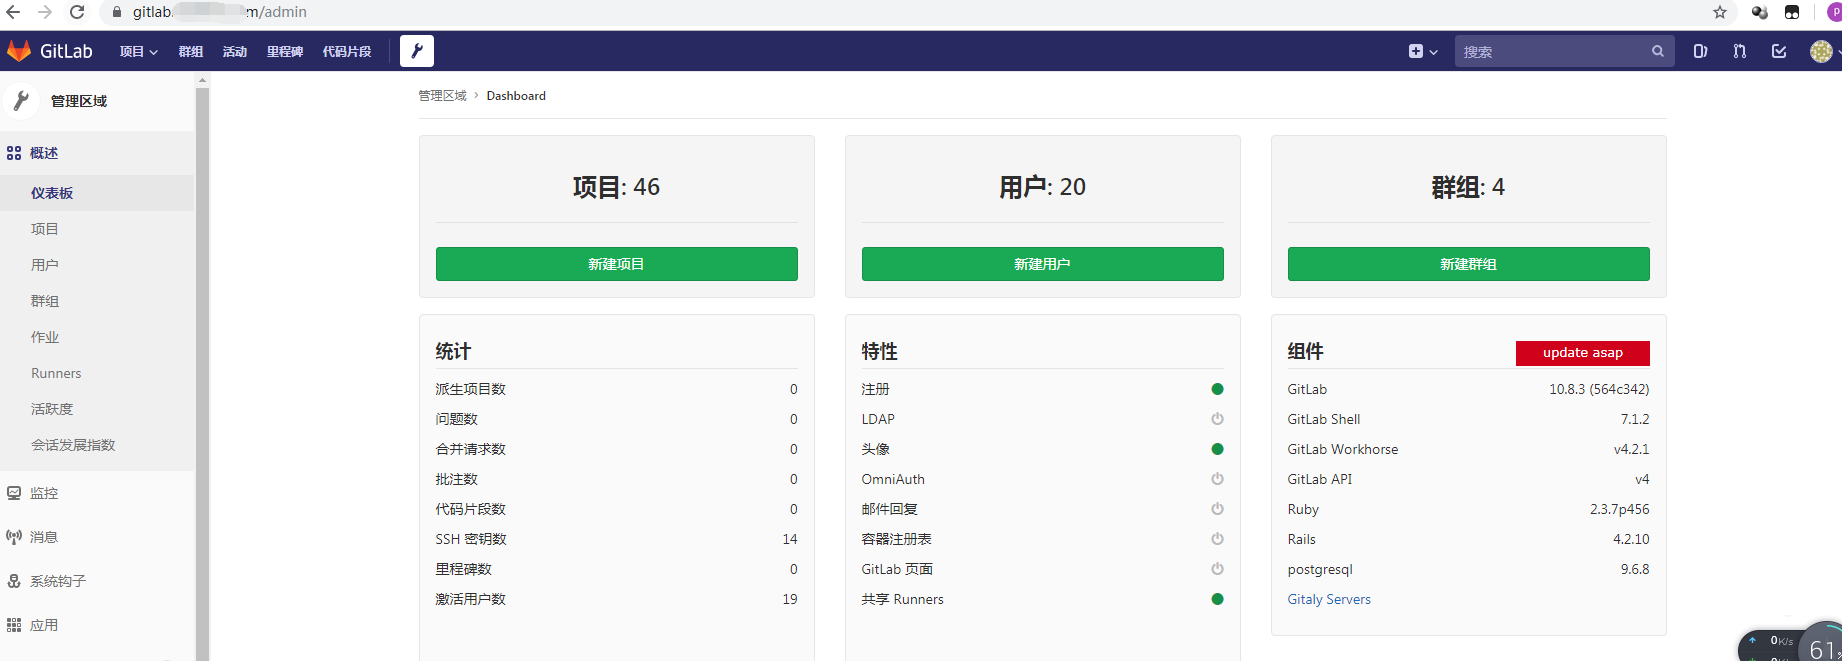
用原有账号密码登录验证项目完整导入
 域名代理方式用了腾讯云的slb
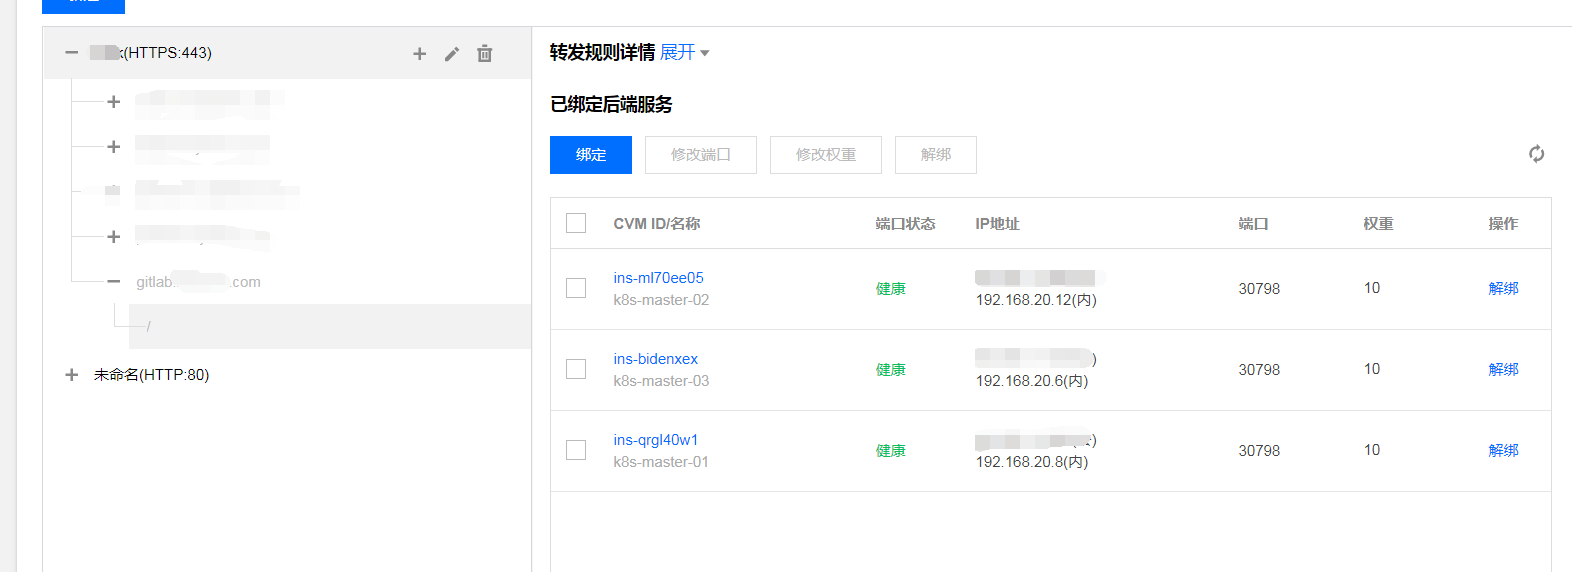
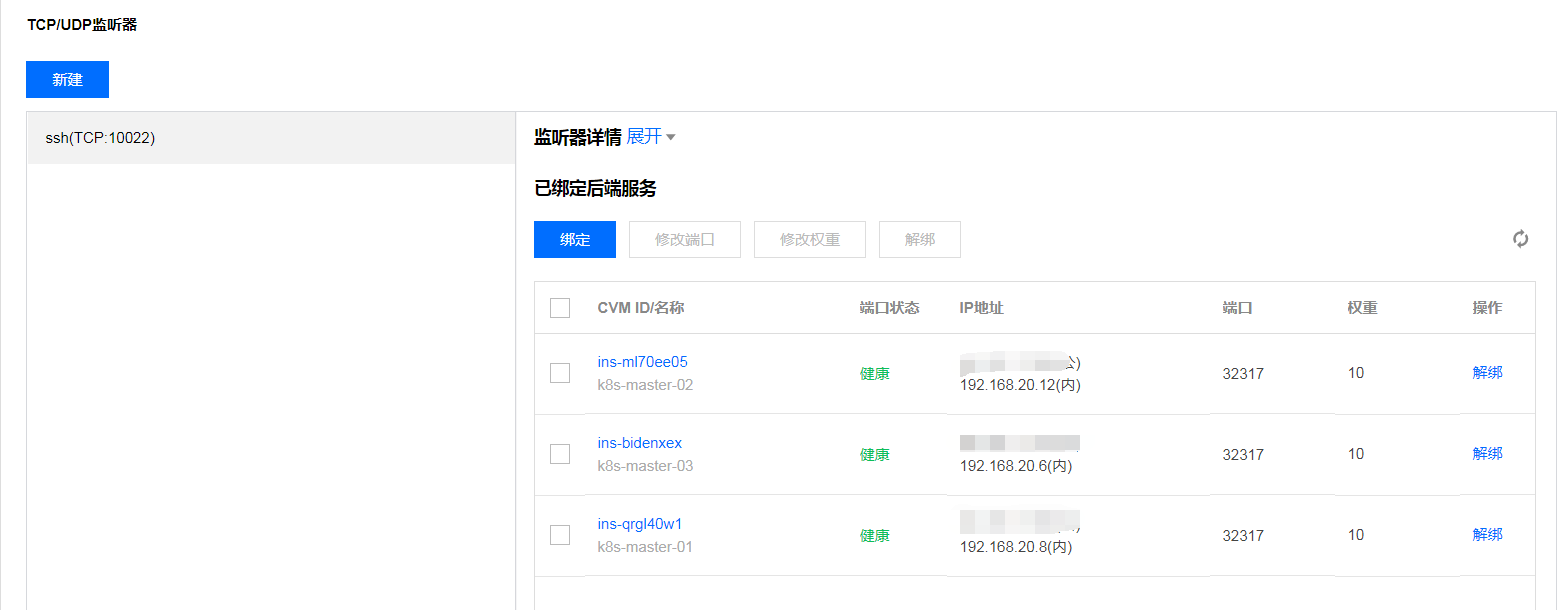
域名方式验证
找一台服务器:
ssh-keygen -t rsa -C "zhangpeng@k8s-node1.com"

添加ssh key 到gitlab  验证ssh访问ok
注: 特别鸣谢阳明大佬,很多东西都是从阳明大佬博客借鉴的,https://www.qikqiak.com/post/gitlab-install-on-k8s/大佬的文章很全。自己写是为了加强自己的记忆
-
kubernetes rook ceph 环境搭建
- 描述背景:
- 节点打标签
- 开始部署rook Operator
- 将节点数据盘加入rook集群
- 安装存储类支持
- 开启dashboard 外部访问:
- 获取rook dashboard 密码
- 登录外部web管理dashboard https方式+nodeport 端口
注: 初始环境为 https://duiniwukenaihe.github.io/2019/09/02/k8s-install/
集群环境:
ip 自定义域名 主机名 192.168.20.13 master.k8s.io k8s-vip 192.168.2.8 master01.k8s.io k8s-master-01 192.168.2.12 master02.k8s.io k8s-master-02 192.168.2.6 master03.k8s.io k8s-master-03 192.168.2.3 node01.k8s.io k8s-node-01 192.168.2.9 node02.k8s.io k8s-node-02 注: 操作都在master01操作默认,master03 node01 node02 各除系统盘外挂载一未格式化数据盘 vdb

描述背景:
上篇腾讯云高可用k8s环境安装完成后准备入手迁移服务,然后就需要一个StorageClass。常用的一般nfs较多,看网上有rook的ceph方案。然后就常识使用了下。
由于rook选择搭三节点的架构,故将master03去掉标签加入调度:
kubectl taint nodes k8s-master-03 node-role.kubernetes.io/master-节点打标签
kubectl label nodes {k8s-master-03,k8s-node-01,k8s-node-02} ceph-osd=enabled

kubectl label nodes {k8s-master-03,k8s-node-01,k8s-node-02} ceph-mon=enabled

kubectl label nodes k8s-master-03 ceph-mgr=enabled
开始部署rook Operator
克隆rook github仓库到本地
git clone https://github.com/rook/rook.git
cd rook/cluster/examples/kubernetes/ceph/
kubectl apply -f common.yaml
创建operator 和agent容器
kubectl apply -f operator.yaml
cluster.yaml修改
##绑定mon osd mgr运行节点
    mon:
      nodeAffinity:
        requiredDuringSchedulingIgnoredDuringExecution:
          nodeSelectorTerms:
          - matchExpressions:
            - key: ceph-mon
              operator: In
              values:
              - enabled
    osd:
      nodeAffinity:
        requiredDuringSchedulingIgnoredDuringExecution:
          nodeSelectorTerms:
          - matchExpressions:
            - key: ceph-osd
              operator: In
              values:
              - enabled
    mgr:
      nodeAffinity:
        requiredDuringSchedulingIgnoredDuringExecution:
          nodeSelectorTerms:
          - matchExpressions:
            - key: ceph-mgr
              operator: In
              values:
              - enabled
将节点数据盘加入rook集群
  storage: # cluster level storage configuration and selection
    useAllNodes: false
    useAllDevices: false
    deviceFilter:
    location:
    config:
      # The default and recommended storeType is dynamically set to bluestore for devices and filestore for directories.
      # Set the storeType explicitly only if it is required not to use the default.
      # storeType: bluestore
      # metadataDevice: "md0" # specify a non-rotational storage so ceph-volume will use it as block db device of bluestore.
      databaseSizeMB: "1024" # uncomment if the disks are smaller than 100 GB
      journalSizeMB: "1024"  # uncomment if the disks are 20 GB or smaller
      osdsPerDevice: "1" # this value can be overridden at the node or device level
      # encryptedDevice: "true" # the default value for this option is "false"
# Cluster level list of directories to use for filestore-based OSD storage. If uncommented, this example would create an OSD under the dataDirHostPath.
    #directories:
    #- path: /var/lib/rook
# Individual nodes and their config can be specified as well, but 'useAllNodes' above must be set to false. Then, only the named
# nodes below will be used as storage resources.  Each node's 'name' field should match their 'kubernetes.io/hostname' label.
    nodes:
    - name: "k8s-master-03"
      devices:
      - name: "vdb"
    - name: "k8s-node-01"
      devices:
      - name: "vdb"
    - name: "k8s-node-02"
      devices:
      - name: "vdb"
kuberctl apply -f cluster.yaml
kubectl get pods -n rook-ceph -o wide

数据节点 conpleted 完成 在master03 node01 node02 执行lsblk 看到vdb数据盘已经被rook格式化识别。

安装存储类支持
kubectl apply -f storageclass.yaml

开启dashboard 外部访问:
kubectl apply -f dashboard-external-https.yaml
kubectl get svc -n rook-ceph

获取rook dashboard 密码
kubectl -n rook-ceph get secret rook-ceph-dashboard-password -o jsonpath="{['data']['password']}" | base64 --decode && echo
登录外部web管理dashboard https方式+nodeport 端口
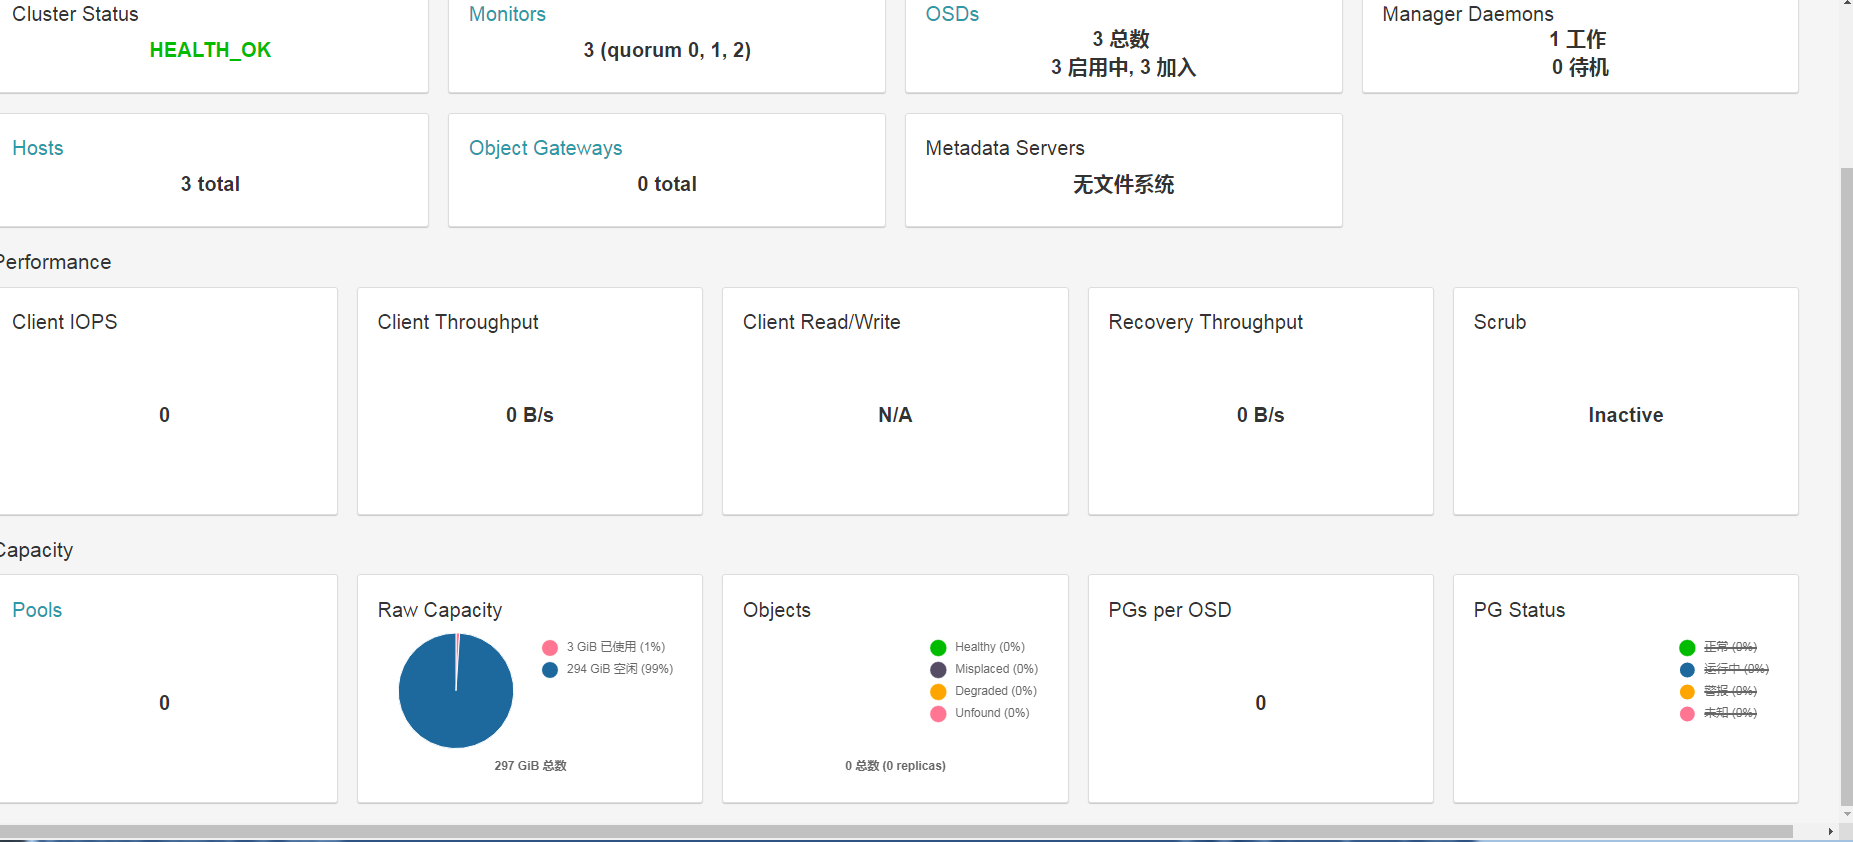
注: rook1.0早先版本体验时候 dashboard 安装完成后会有500报错,后面没有了就没有写,具体解决方法可参考https://blog.csdn.net/dazuiba008/article/details/90205319。如需要tools 客户端 kubectl apply -f toolbox.yaml.
-
腾讯云高可用k8s环境安装
腾讯云高可用 k8s 集群安装文档
注: 参考https://blog.csdn.net/qq_32641153/article/details/90413640集群环境:
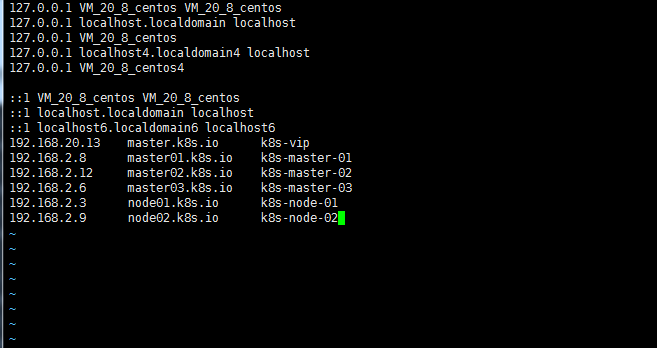
ip 自定义域名 主机名 192.168.20.13 master.k8s.io k8s-vip 192.168.2.8 master01.k8s.io k8s-master-01 192.168.2.12 master02.k8s.io k8s-master-02 192.168.2.6 master03.k8s.io k8s-master-03 192.168.2.3 node01.k8s.io k8s-node-01 192.168.2.9 node02.k8s.io k8s-node-02 host如下图:
注: 防火墙 selinux  swap   默认系统镜像已经关闭 最大文件开启个数等已经优化
#swap
swapoff -a
sed -i 's/.*swap.*/#&/' /etc/fstab
#selinux
setenforce  0
sed -i "s/^SELINUX=enforcing/SELINUX=disabled/g" /etc/sysconfig/selinux
sed -i "s/^SELINUX=enforcing/SELINUX=disabled/g" /etc/selinux/config
sed -i "s/^SELINUX=permissive/SELINUX=disabled/g" /etc/sysconfig/selinux
sed -i "s/^SELINUX=permissive/SELINUX=disabled/g" /etc/selinux/config

#调整文件打开数等配置
echo "* soft nofile 65536" >> /etc/security/limits.conf
echo "* hard nofile 65536" >> /etc/security/limits.conf
echo "* soft nproc 65536"  >> /etc/security/limits.conf
echo "* hard nproc 65536"  >> /etc/security/limits.conf
echo "* soft  memlock  unlimited"  >> /etc/security/limits.conf
echo "* hard memlock  unlimited"  >> /etc/security/limits.conf
-
hello jekyll!
当年创建 jekyll 时默认的一篇文章,没什么意义,我也一直没删除,留个纪念吧。
- 2022-08-09-Operator3-设计一个operator二-owns的使用
- 2022-07-11-Operator-2从pod开始简单operator
- 2021-07-20-Kubernetes 1.19.12升级到1.20.9(强调一下selfLink)
- 2021-07-19-Kubernetes 1.18.20升级到1.19.12
- 2021-07-17-Kubernetes 1.17.17升级到1.18.20
- 2021-07-16-TKE1.20.6搭建elasticsearch on kubernetes
- 2021-07-15-Kubernets traefik代理ws wss应用
- 2021-07-09-TKE1.20.6初探
- 2021-07-08-关于centos8+kubeadm1.20.5+cilium+hubble的安装过程中cilium的配置问题--特别强调
- 2021-07-02-腾讯云TKE1.18初体验