- 描述背景:
- 节点打标签
- 开始部署rook Operator
- 将节点数据盘加入rook集群
- 安装存储类支持
- 开启dashboard 外部访问:
- 获取rook dashboard 密码
- 登录外部web管理dashboard https方式+nodeport 端口
注: 初始环境为 https://duiniwukenaihe.github.io/2019/09/02/k8s-install/
集群环境:
| ip | 自定义域名 | 主机名 |
|---|---|---|
| 192.168.20.13 | master.k8s.io | k8s-vip |
| 192.168.2.8 | master01.k8s.io | k8s-master-01 |
| 192.168.2.12 | master02.k8s.io | k8s-master-02 |
| 192.168.2.6 | master03.k8s.io | k8s-master-03 |
| 192.168.2.3 | node01.k8s.io | k8s-node-01 |
| 192.168.2.9 | node02.k8s.io | k8s-node-02 |
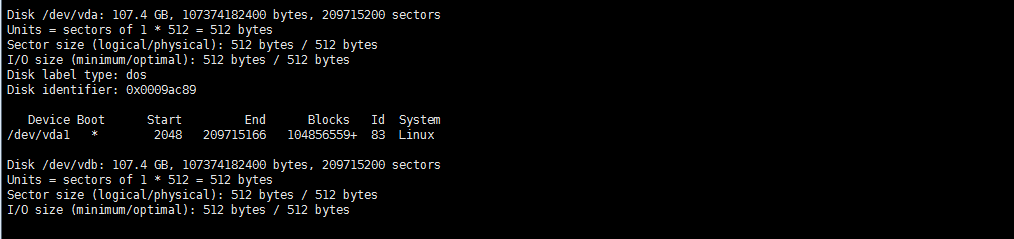
注: 操作都在master01操作默认,master03 node01 node02 各除系统盘外挂载一未格式化数据盘 vdb
描述背景:
上篇腾讯云高可用k8s环境安装完成后准备入手迁移服务,然后就需要一个StorageClass。常用的一般nfs较多,看网上有rook的ceph方案。然后就常识使用了下。
由于rook选择搭三节点的架构,故将master03去掉标签加入调度:
kubectl taint nodes k8s-master-03 node-role.kubernetes.io/master-
节点打标签
kubectl label nodes {k8s-master-03,k8s-node-01,k8s-node-02} ceph-osd=enabled

kubectl label nodes {k8s-master-03,k8s-node-01,k8s-node-02} ceph-mon=enabled

kubectl label nodes k8s-master-03 ceph-mgr=enabled
开始部署rook Operator
克隆rook github仓库到本地
git clone https://github.com/rook/rook.git
cd rook/cluster/examples/kubernetes/ceph/
kubectl apply -f common.yaml
创建operator 和agent容器
kubectl apply -f operator.yaml
cluster.yaml修改
##绑定mon osd mgr运行节点
    mon:
      nodeAffinity:
        requiredDuringSchedulingIgnoredDuringExecution:
          nodeSelectorTerms:
          - matchExpressions:
            - key: ceph-mon
              operator: In
              values:
              - enabled
    osd:
      nodeAffinity:
        requiredDuringSchedulingIgnoredDuringExecution:
          nodeSelectorTerms:
          - matchExpressions:
            - key: ceph-osd
              operator: In
              values:
              - enabled
    mgr:
      nodeAffinity:
        requiredDuringSchedulingIgnoredDuringExecution:
          nodeSelectorTerms:
          - matchExpressions:
            - key: ceph-mgr
              operator: In
              values:
              - enabled
将节点数据盘加入rook集群
  storage: # cluster level storage configuration and selection
    useAllNodes: false
    useAllDevices: false
    deviceFilter:
    location:
    config:
      # The default and recommended storeType is dynamically set to bluestore for devices and filestore for directories.
      # Set the storeType explicitly only if it is required not to use the default.
      # storeType: bluestore
      # metadataDevice: "md0" # specify a non-rotational storage so ceph-volume will use it as block db device of bluestore.
      databaseSizeMB: "1024" # uncomment if the disks are smaller than 100 GB
      journalSizeMB: "1024"  # uncomment if the disks are 20 GB or smaller
      osdsPerDevice: "1" # this value can be overridden at the node or device level
      # encryptedDevice: "true" # the default value for this option is "false"
# Cluster level list of directories to use for filestore-based OSD storage. If uncommented, this example would create an OSD under the dataDirHostPath.
    #directories:
    #- path: /var/lib/rook
# Individual nodes and their config can be specified as well, but 'useAllNodes' above must be set to false. Then, only the named
# nodes below will be used as storage resources.  Each node's 'name' field should match their 'kubernetes.io/hostname' label.
    nodes:
    - name: "k8s-master-03"
      devices:
      - name: "vdb"
    - name: "k8s-node-01"
      devices:
      - name: "vdb"
    - name: "k8s-node-02"
      devices:
      - name: "vdb"
kuberctl apply -f cluster.yaml
kubectl get pods -n rook-ceph -o wide
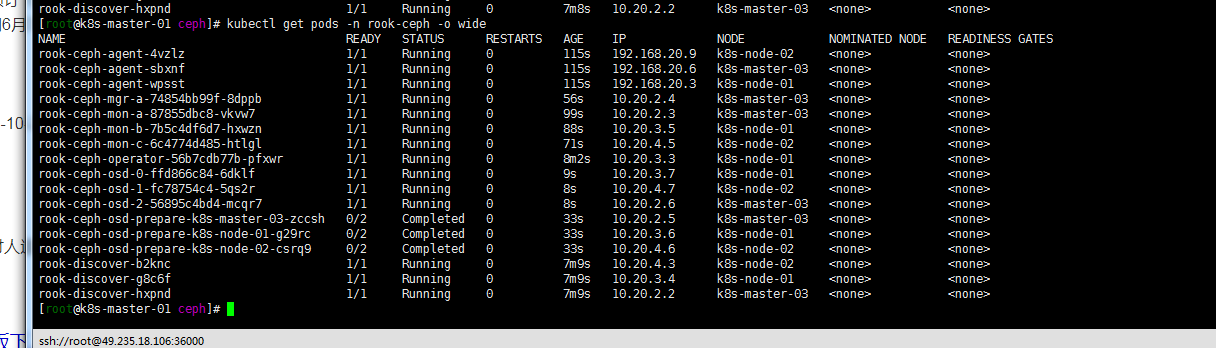
数据节点 conpleted 完成 在master03 node01 node02 执行lsblk 看到vdb数据盘已经被rook格式化识别。

安装存储类支持
kubectl apply -f storageclass.yaml

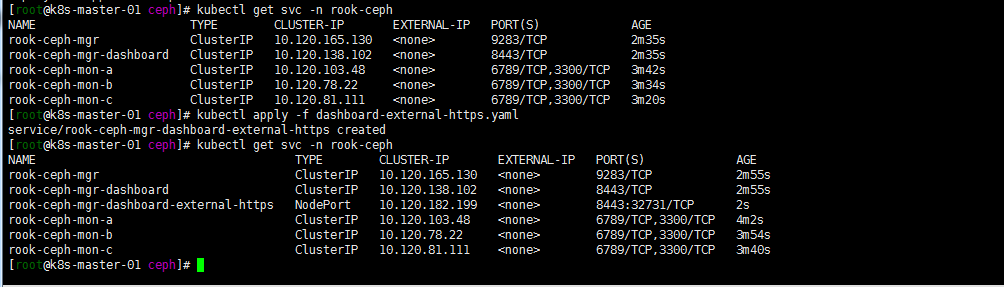
开启dashboard 外部访问:
kubectl apply -f dashboard-external-https.yaml
kubectl get svc -n rook-ceph
获取rook dashboard 密码
kubectl -n rook-ceph get secret rook-ceph-dashboard-password -o jsonpath="{['data']['password']}" | base64 --decode && echo

登录外部web管理dashboard https方式+nodeport 端口
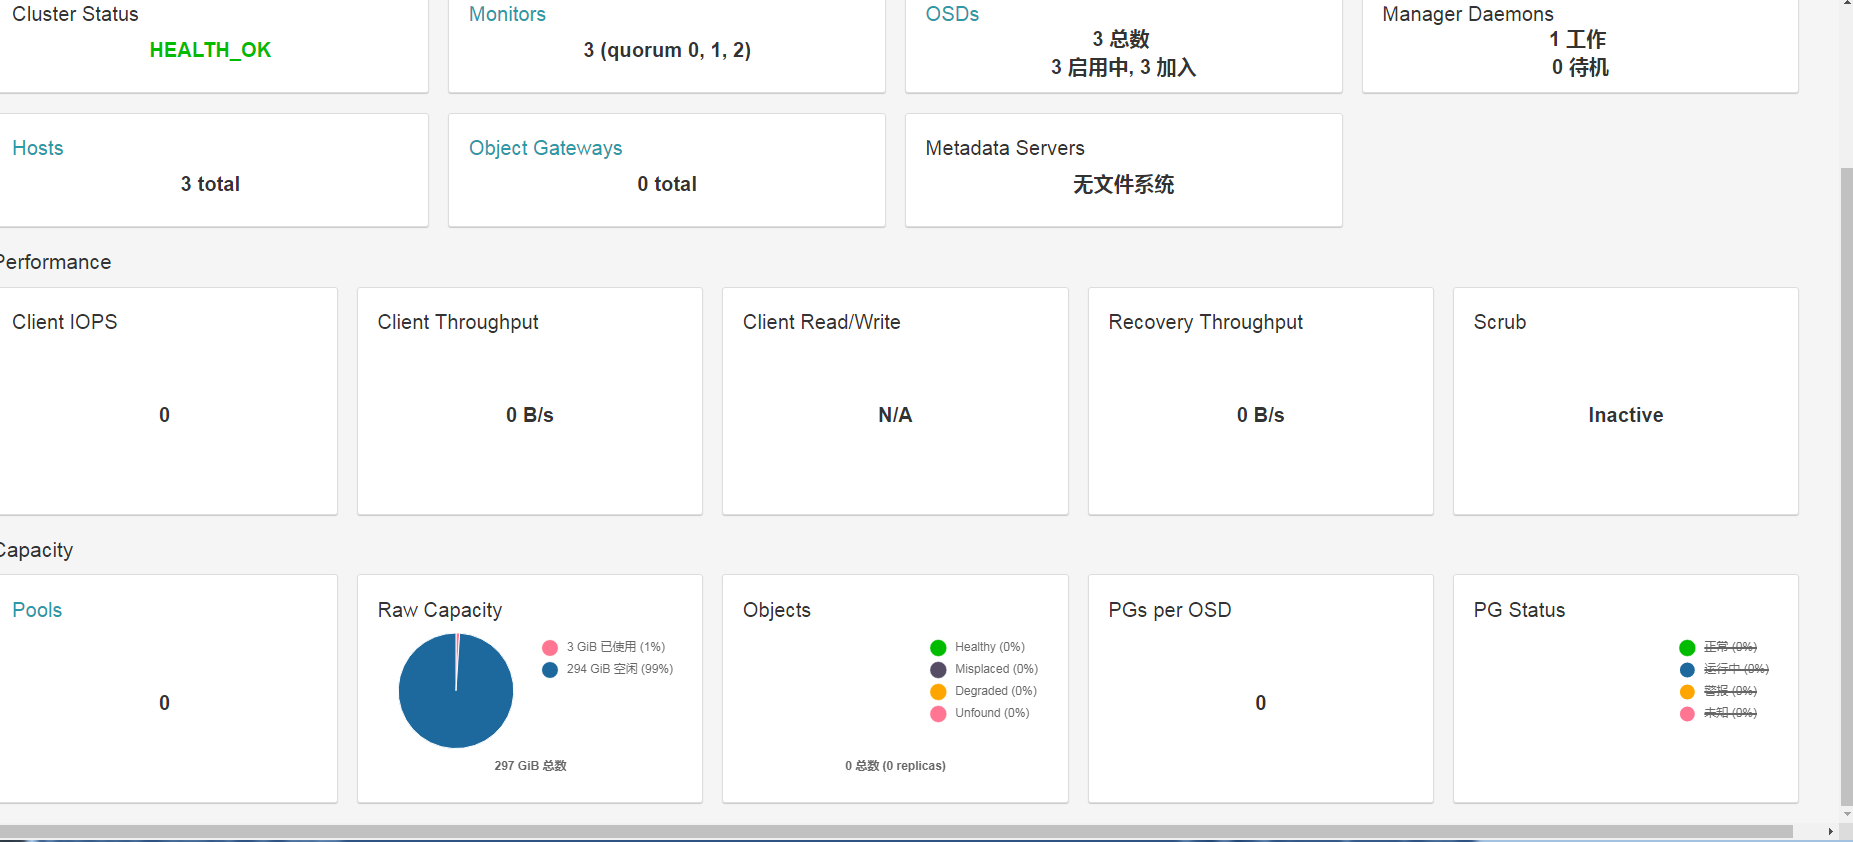
注: rook1.0早先版本体验时候 dashboard 安装完成后会有500报错,后面没有了就没有写,具体解决方法可参考https://blog.csdn.net/dazuiba008/article/details/90205319。如需要tools 客户端 kubectl apply -f toolbox.yaml.